
Pasta, Pizza and Espresso are all delicious hallmarks of Italian food culture. A Moka Pot is a staple of this well loved food culture, used regularly to fill coffee cups with a bold, dark espresso style coffee.
Whether you refer to it as a Moka Pot, stove-top coffee maker, Bialetti or Moka Espress this is a brewing method and tool that is worth getting to know.
If you’re new to the Moka Pot brewing method, you will most likely need a good Moka Pot. Check out two of our favorite and fairly priced Moka Pots the Bialetti Espress Moka Pot and the Cuisnox Roma Moka Espress Maker.
Contents
What is a Moka Pot?
In 1933 the Moka Pot was created by Alfonso Bialetti bringing with it a new method and flavor for brewing bold, strong coffee. In its simplest form a Moka Pot is a stove-top or sometimes electric coffee maker that brews coffee by running boiling water pressurized as steam through ground coffee.
For a review of our top picks for ground coffee click here.
Many often associate the rich and dark coffee the Moka Pot creates with espresso. Although its bold brew has a very similar strength, taste and feel as espresso it is not a true espresso.
Interestingly enough the method in which the Moka Pot brews coffee isn’t that much different than how original espresso machines were designed which use steam to force water through the coffee grounds.
Although not “true” espresso, the coffee brewed in a Moka Pot will be stronger than drip coffee. You can expect the coffee made in a Moka Pot will be a hybrid between true espresso and traditional drip coffee.
It is also a cheaper, more cost effective way to create strong coffee that will closely mirror an espresso shot while dodging the expense of owning an espresso maker.
If you are interested in traditional espresso an automatic espresso maker may be a better fit. If you want espresso like coffee that requires little to no effort to brew you should consider a Nespresso Machine, take a look at our list of best Nespresso Machines.
Moka Pot Brewing Guide
It is important to remember that coffee made in a Moka Pot will be 2 to 3 times more concentrated than traditional drip coffee. You can expect a cup that is heavy bodied, bold and intense.
Although notorious for producing a bitter brew, when done correctly, the Moka Pot can create a well balanced cup. To successfully brew a delicious cup follow the steps below:
What You Will Need
- A Moka Pot
- Coffee Beans – We recommend an espresso blend such as this Nicoletti Coffee Espresso Roast Beans.
- A Coffee Grinder – We recommend an automatic burr grinder such as the Capresso Infinity Conical Burr Grinder.
- A Kettle – For hot water, we like this pour over tea kettle by Ovalware.
- A Scale – To measure your coffee beans. For an option that works well and won’t break the bank we recommend the Fuzion Coffee Scale.
- Timer – A scale with a timer will work great. If not, you can use any timer or clock including this cost effective option the WrenWane Timer.
Step # 1 – Preheat Water
Fill the kettle with water and bring to a boil. Once boiling, remove from the heat.
We recommend preheating the water because this prevents the Moka Pot from getting too hot. When the Moka Pot gets too hot, it can cook the coffee which results in a metallic taste.
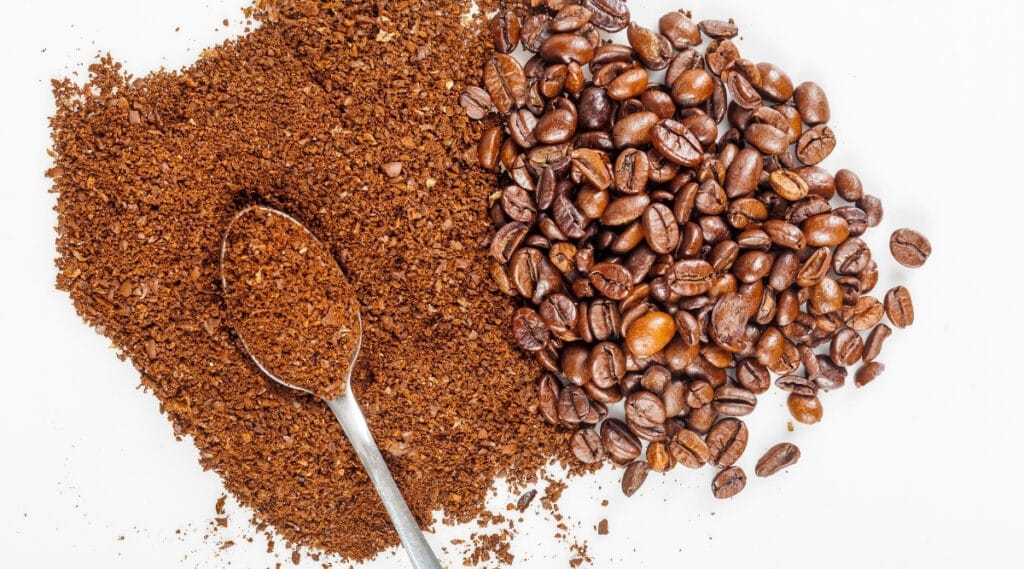
Step # 2 – Grind the Coffee Beans
We recommend that you grind your coffee on a medium grind setting. For reference, for a 4 cup Moka Pot you will need about 17 grams of coffee, for a 6 cup Moka Pot you will want to grind about 25 grams of coffee.
Grind is an important factor that directly affects the taste of your coffee. We have included more about grind size recommendations for Moka Pots later on in this article.
Step # 3 – Add Heated Water
Using the preheated water, fill the Moka Pot with water up to the fill line in the bottom of the brewer.
Step # 4 – Insert Filter Basket
Place the filter basket into the bottom of the Moka Pot.
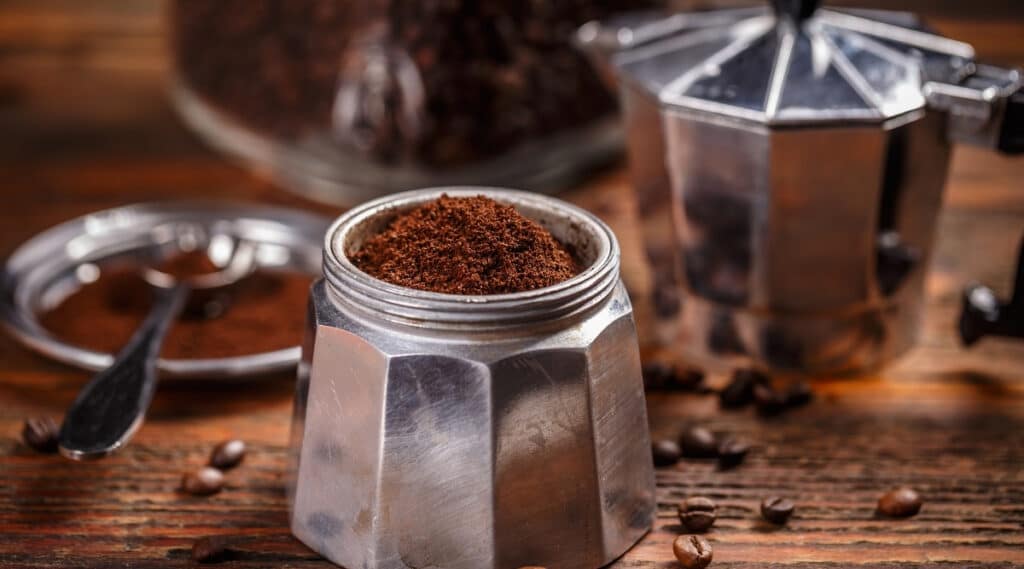
Step # 5 – Add Coffee
Fill the basket with your freshly ground coffee. You will want to place the coffee so it is level with the basket. You will want it full, but the grounds do not need to be packed in there tightly.
Step # 6 – Put the Moka Pot Together
Taking care to not touch anywhere the pot is hot, place the top and bottom of the Moka Pot together.
Step # 7 – Place Moka Pot on the Stove
Turn the stove on medium heat and place the Moka Pot on the stove with the top lid open.
Step # 8 – Watch for Coffee to Be Brewed
You will hear the signature Moka Pot sounds indicating that brewing is in progress. You will see coffee starting to come out in a dark brown stream that will get lighter as brewing progresses. Once the coffee is golden in color, you will want to close the lid and remove the Moka Pot from the stove or heat source. We recommend you use pot holders, or other hot pads to ensure you don’t burn yourself.
Step # 9 – Chill the Moka Pot
To prevent the coffee from developing a metallic taste you will want to prevent over extraction. The easiest and quickest way to do this is to cool the Moka Pot down by either running the bottom of the Moka Pot under cold tap water, placing the pot in a bowl of ice or to wrap a chilled towel around the base of the pot.
Once chilled place the Moka Pot on a heat resistant surface.
Step # 10 – Ready to Enjoy
You can now pour the coffee and enjoy! For a milder, less concentrated flavor you can dilute the coffee with hot water.
Grind Size for Moka Pot
As mentioned, grind size is one of the most important factors that can impact the flavor of your coffee. The size of your grind is how big or small each coffee ground is. Grind size determines how quickly the water used for brewing will be able to dissolve the coffee grounds turning your water the signature coffee brown color and creating the much sought after coffee taste.
For the Moka Pot there a couple grind options for you to consider. Each one is truly a matter of personal taste and preference. If you are just beginning brewing in your Moka Pot we recommend you experiment with each grind size to find which one tastes the best to you.
Option # 1 – The more traditional grind size for espresso or espresso like coffee is using a very fine, salt like grind. Many prefer this option when brewing in a Moka Pot.
Option # 2 – An alternative option that some prefer is using a medium grind for the beans going into your Moka Pot. This would result in a ground coffee that is more similar to what you would use in a drip coffee maker. A medium grind should result in a sweeter, non bitter brew. This brew, however, will still have some acidity to it.
If you are not a fan or are sensitive to acidic coffee, then a fine grind will be a better choice for you. To learn more about acid in coffee, check out our article on acidic coffee.
Temperature
Just like Goldilocks and the three bears, temperature plays a role in having your coffee taste “just right”. Hot and cold are elements that are easy to control and can have a large impact on the taste of your brew.
Two of the most popular temperature control techniques used for Moka Pots are pre-heating and cooling the water.
Pre-heating
Many recommend pre-heating the water used to brew coffee in the Moka Pot using a separate kettle to heat the water. This is a recommended step because it causes the Moka Pot to use less time in contact with the heat source, therefore reducing the bitter taste that results from over extraction of the coffee beans.
Cooling
The other popular temperature control method used for Moka Pots is to immediately cool the Moka Pot once brewing is complete. Most perform this step by either placing the Moka Pot in a bowl of ice water, running cold tap water over the Moka Pot or wrapping a cold rag around the Moka Pot right after brewing.
The reason cooling of the Moka Pot after brewing is recommended is so that it completely stops the brewing process. Cooling the Moka Pot will stop the water in the pot from moving through the coffee grounds and will also stop the coffee that has been brewed from coming in contact with the metal the pot is made of.
The latter reason is why many choose to cool their Moka Pot immediately after brewing. Moka Pot coffee is notorious for producing coffee that can taste bitter or metallic. Eliminating the probability that the coffee and metal will touch any longer than necessary will help avoid the much hated metallic taste in your coffee.
There are separate schools of thought around these heating and cooling methods. Some swear it results in the best tasting cup brewed in a Moka Pot possible. Others feel these steps just add unnecessary work to the Moka Pot brewing process and instead recommend pouring the coffee out of the Moka Pot into a separate cup or container right after brewing to avoid metallic or bitter tastes.
How to Clean a Moka Pot

Cleaning a Moka Pot can be a bit tedious, and is probably one of Cozy’s least favorite steps in the brewing process. Once you have removed the coffee from your Moka Pot, you will need to allow the pot to sit so the metal can cool down enough so that you can safely touch it while cleaning it.
When cleaning your Moka Pot it is important to not do anything during the cleaning process, such as use soap, that will interfere with the flavor of the coffee brewed in the Moka Pot. In fact, soap is not ever recommended for cleaning a Moka Pot. This is because the residue from soap can interfere with the taste of the coffee. Over time, it can even ruin the finish of the Moka Pot!
As soap is not recommended, neither is placing your Moka Pot in the dishwasher. Dishwashing your Moka Pot will cause both corrosion and oxidation which will contribute to making your coffee taste metallic.
With all that said, it is safe to say the Moka Pot is sensitive to most cleaning options and requires a soft touch. Because of this, cleaning your Moka Pot is a bit higher maintenance than most other brewing options.
To clean your Moka Pot, you will need the following:
- Moka pot
- Warm water
- Soft dishcloth
Follow the below steps to properly clean your Moka Pot:
Step # 1 – Empty the Coffee Grounds From the Moka Pot
Once your Moka Pot has cooled completely, open it up and remove the used ground from the basket.
Step # 2 – Take the Moka Pot Apart
Remove all the pieces of the Moka Pot so each component can be properly cleaned, also be sure to remove the gasket and filter.
Step # 3 – Rinse the parts of the Moka Pot With Water
Run each component of the Moka Pot under warm water, loosening any debris as you clean.
Step # 4 – Dry the Moka Pot
Using the soft cloth, dry each part of the Moka Pot thoroughly. You can also set them out on a rack to dry.
Step # 5 – Reassemble the Moka Pot
Once dry, reassemble the Moka Pot so it is ready to go next time you are in the mood for a cup!
In addition, we recommend every 60 days that you do a deep clean of your Moka Pot using equal parts water and distilled vinegar. This will prevent scale buildup in your Moka Pot and prevent any clogs.
Cozy’s Conclusion
Moka Pots are a traditional italian brewing tool that has re-gained popularity for those seeking a bold, espresso like cup of coffee.
Moka Pots are portable, compact and can be easy to use. They do require more maintenance and attention to the brewing process than automatic coffee makers to ensure your brew does not come out tasting bitter or metallic.
If you are seeking a strong, bold cup of coffee then the Moka Pot is a good fit. We hope using this guide you are able to enjoy the perfect Moka Pot brewed cup. CIAO!